

Table of contents
- What can be shared in Profile README?
- Step by Step Instructions to create a Profile README:
- Step 1: Create a Repository with your username as Repo Name
- Step2: Clone your repo to local Computer
- Step 3: Start Editing the README
- Step 4: Commit and Push the code to your GitHub repo
- OpenSource Widgets to Power GitHub Profile README
- 1. Profile Visitors Counter Widget
- 2. GitHub Overall Stats
- 3. Top Languages Widget
- 4. Include Gmail, LinkedIn cards
- For further readings and experimentation
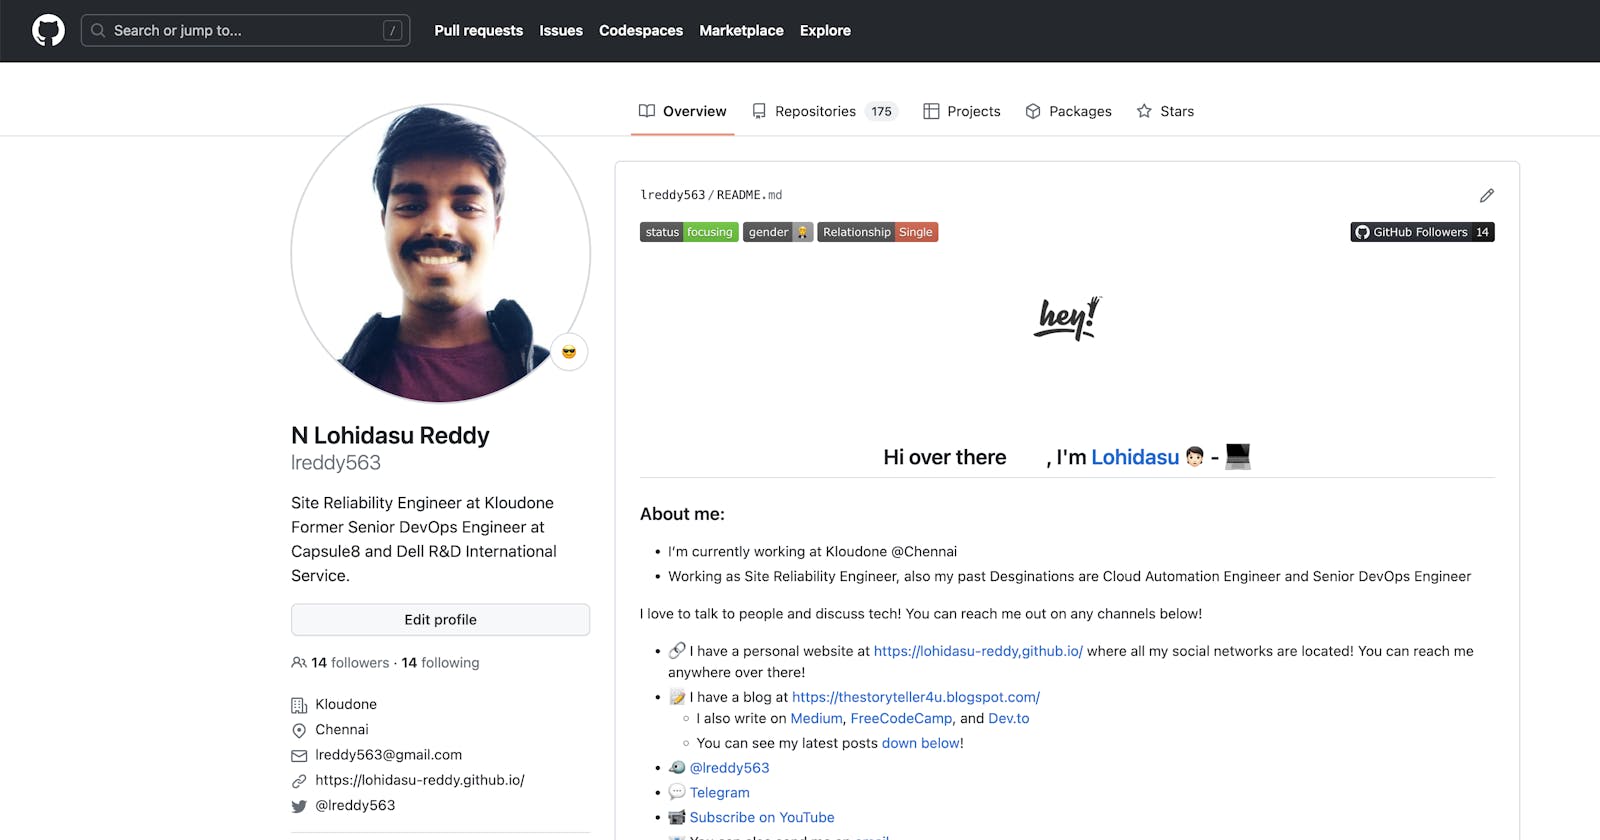
I recently created my GitHub Profile README and it is one of the most useful features in GitHub. This isn’t just any bio section, as one in LinkedIn.
Profile README supports Markdown! this opens up a lot of ways to present ourselves to the visitors and create the best first impression. Feel free to checkout my GitHub profile README here:
Feel free to checkout my GitHub profile README here: Profile README
What can be shared in Profile README?
README files are built using Markdown, it is highly customizable. There aren’t really any guidelines on what we can share and what you can’t share on this README, our only limit is our imagination.
My personal suggestion would be to make the README that represents your uniqueness and character. Look at plenty of other Profile README’s, you will get your own unique idea that will represent your personality well. This will help your profile be more aesthetic and visually pleasing.
Step by Step Instructions to create a Profile README:
This is a step-by-step instruction to create a GitHub Profile README, assuming you already have a GitHub account. My personal preference is VSCode, so I will use VSCode and its extension in the following steps.
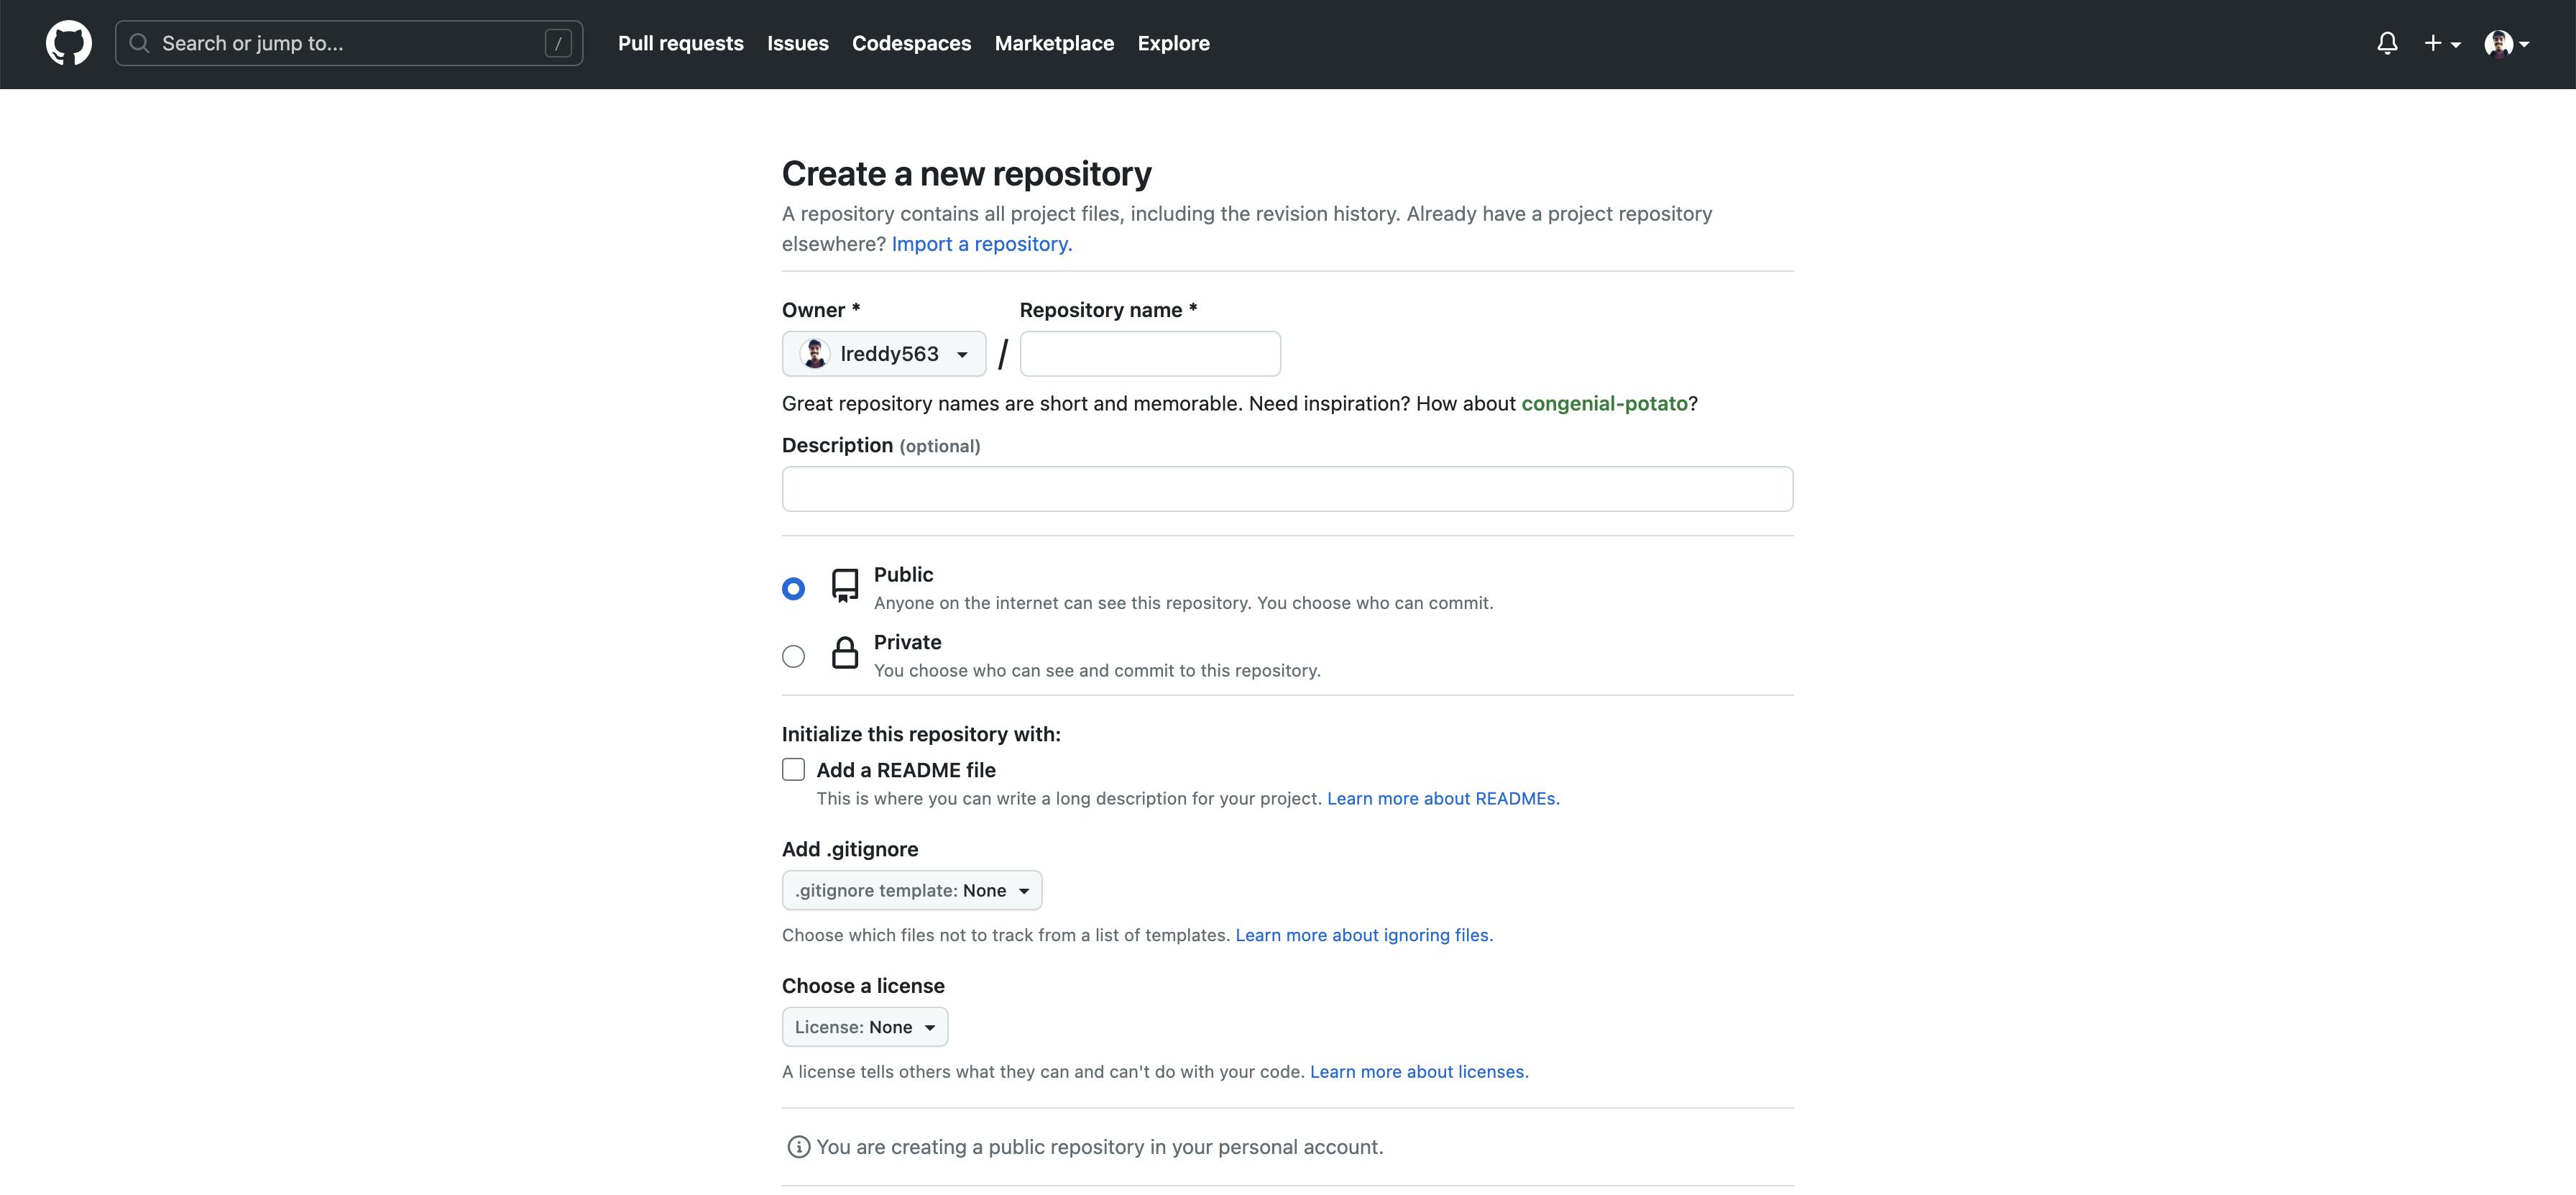
Step 1: Create a Repository with your username as Repo Name
Go to https://github.com/new and create a repo with exactly the same name as your username. Make sure the repo you create looks like this Username/Username
Example:
lreddy563/lreddy563
Naming the repo this way intimates GitHub, that this is not just any repository, but a Profile README repository. And GitHub will make sure to display this page right up front on your Profile.
During the repo creation process, Make sure of the following:
visibility is “Public”
“Add a README file” checkbox is checked.
Step2: Clone your repo to local Computer
After you create a repository with the above mentioned specifications, the next step is to clone the repository to your local computer, so we can start editing the README file.
Proceed to the next step if you are already proficient in cloning repositories using Git. Else, here is a method to clone a repo using Command Line/Terminal. If you are using windows, make sure your computer has GitBash installed.
Copy the URL for cloning the repository.
Navigate to the directory where you want to create a copy of this repository, and execute the git clone command followed by the URL that you copied in Step1.
git clone https://github.com/<USER-REPO-NAME>.git
You can use any editor as per your liking, but the VS Code has amazing extensions that make life easier.
Step 3: Start Editing the README
You can start editing the README.md file in the cloned repository and add all the information that you want.
Here are markdown cheatsheets that can come in very handy when you are trying to write your own markdown file.
Step 4: Commit and Push the code to your GitHub repo
If you are not that acquainted with Git operations, you can use the following commands in the terminal/command line to push the changes to the GitHub repo.
git add --all
git commit -m "<Commit message goes here>"
git push
After you push your changes to the GitHub repo, you can visit your GitHub profile to see your README visible on the home screen. You can use it to list your projects, share ideas, brand yourself, share your profile, even create games, and lots more.
OpenSource Widgets to Power GitHub Profile README
Some of the free open-source widgets that you can use in your GitHub profile to make it more appealing and add more informative.
It includes Plug and Play code, which you can copy paste into your README, make minor edits, and get these widgets live on your Profile running within seconds.
1. Profile Visitors Counter Widget
Profile Counter Widget
This widget can help us keep track of the number of times our profile has been viewed. When you add this widget to your profile and every time someone visits your GitHub profile the counter increments itself by one.
Visitor Badge is a free online service that lets us allow this widget to our profile with a single line of markdown code.
Copy-paste the following markdown code into your README file, and replace username and reponame with your username and repository name.

Note: Make sure the pageid is unique, as the profile counter widget keeps count based on pageid. Using your username followed by your repoName should be fine.
2. GitHub Overall Stats
You can add your GitHub overall stats to your Profile readme to give an overview of your projects, commits, and contributions.
Github overall stats
Use the following code as a guide to including your GitHub overall summary in your README profile page.

Replace ‘laxmena’ in the above markdown code with your GitHub username
If you don’t want to include your private repositories in the stats, then set false for the count_private attribute.
setting show_icons to true, displays star, commit, pull request, and other icons in the stats image.
hide attribute lets you choose which attributes you don’t want to be published in your profile.
Feel free to play with these attributes as per your liking.
3. Top Languages Widget
This widget allows you to include a stats graph about all the Programming languages that you have used in your repository.
Top Languages Stats Widget
You can customize this card, you can have the card list all the languages that you’ve used, or you can choose the languages to ignore from the list. The markdown code to include this in your profile is

replace username ‘laxmena’ with your username.
If you want elaborate stats on all the languages that you’ve used in your GitHub, remove the layout attribute.
add an attribute hide, which will allow you to hide specific languages from the stats image. for example, if you want to hide CSS from the list, hide=css will remove CSS from the image.
4. Include Gmail, LinkedIn cards
If you are looking to add contact methods to your GitHub profile, try out aesthetic cards instead. There are cards available for different platforms, here I’ll show the most common two ways to contact — Email and LinkedIn.
Contact Cards
Adding Gmail Card:
<a href="mailto:YourEmail@gmail.com"></a>
Copy-paste this code into your README file, and replace YourEmail@gmail.com with your actual email id, and you are ready to go.
LinkedIn Card:
<a href="<LinkedInURL>"></a>
Copy-paste this code into your readme file and replace LinkedInURL with your actual LinkedIn Profile URL.
For further readings and experimentation
You can customize your widgets even further, by selecting plenty of themes available. I like to keep it clean and minimal wherever possible, but there are options to decorate the cards and make them more visually appealing.
Check this link to customize themes for the cards.
Here is a collection of all innovative and creative README’s that you can look for inspiration.
Learn more about the Visitor Badge counter here
HURRAY kudos to you!! have done something awesome.
For DEMO you can check my Github Profile here.